

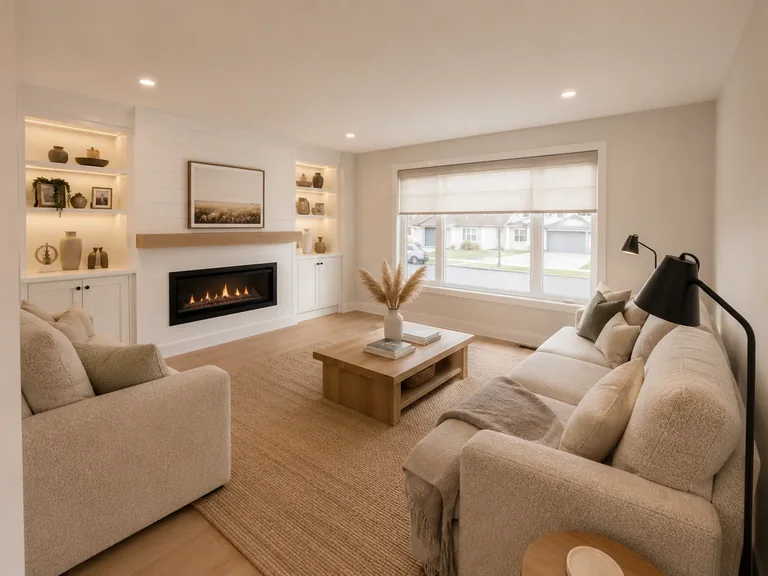
Hardwood Flooring Installation in Brampton
Plan hardwood or engineered-hardwood flooring around the existing floor, connected rooms, and the finish you want to achieve. Loyalty Contracting coordinates removal, preparation, installation, transitions, and final details.
Plan Hardwood Flooring Around Your Home
- Hardwood and engineered-hardwood installation
- Existing-floor removal and surface preparation
- Transitions, baseboards, trims, and stair details
- Final finishing, cleanup, and walkthrough
Hardwood Flooring Planning in Brampton
Flooring planning starts with the rooms involved, the condition of the existing surfaces, and the material direction selected for the home. The proposed scope can then account for removal, preparation, installation layout, and adjoining floors.
Transitions, baseboards, door trim, and applicable stair details should be considered with the floor rather than left as disconnected decisions. The exact work depends on the existing home and the agreed installation scope.
Hardwood Flooring Installation Services
Residential flooring work can be planned for one area, connected rooms, or a wider main-floor renovation, with preparation and finishing defined for the specific project.
Hardwood Installation
Coordinate material direction, plank layout, room connections, edges, and installation details.
Engineered Hardwood
Plan engineered-hardwood installation around the selected product and existing conditions.
Flooring Replacement
Remove existing flooring where included and prepare the exposed surface for the new installation.
Surface Preparation
Review the installation surface and define applicable preparation for the conditions found.
Transitions and Edges
Coordinate connections to adjoining flooring and finish perimeter details within the agreed scope.
Baseboards and Trim
Include applicable baseboard, casing, and trim work as part of the completed flooring finish.
Stair Flooring Details
Plan stair surfaces and connecting finish work where stairs form part of the project.
Finishing and Cleanup
Complete the agreed detail work, cleanup, and final walkthrough after installation.
Engineered Hardwood Flooring
Engineered hardwood is one supported option for residential hardwood flooring projects. Product selection, installation method, plank direction, preparation, and finishing are reviewed in relation to the proposed rooms and existing surfaces.
The Peel Village project below is a local example using wide-plank European White Oak engineered hardwood. Its specifications and installation details apply to that home.
Peel Village Main-Floor Hardwood Project
Loyalty Contracting completed approximately 1,150 sq. ft. of engineered hardwood flooring across the main level of a detached 1970s home in Peel Village, Brampton. The kitchen was excluded from this flooring scope.
Existing Main-Floor Surfaces
The main floor had a mix of original 2 1/4-inch narrow-strip oak hardwood and dated 12x12 ceramic tile through the front foyer and main hallway.
Existing Hardwood Condition
The original hardwood had been refinished multiple times over its life and, based on its condition, was not considered suitable for another refinishing.
European White Oak
The new floor was premium European White Oak engineered hardwood in a 6.5-inch wide-plank format.
Warm Natural Finish
The planks had a warm honey, light natural wood tone with a matte wire-brushed finish.
Project Installation Method
The engineered hardwood was installed using a glue-assist and cleat-fastened method, combining polyurethane construction adhesive with mechanical fastening on this project.
Floor Removal and Subfloor Preparation
The following removal and preparation details responded to the conditions found in this Peel Village home. The preparation needed depends on the condition of the existing floor and subfloor.
Old-Floor Removal
The original strip hardwood, old flooring staples, ceramic tile, and wire mesh beneath the tile were removed, taking the work areas back to the exposed plywood subfloor.
Existing Plywood Subfloor
The original plywood subfloor was structurally sound overall, with some unevenness, notable deflection near the former hallway transition, and many existing squeaks.
Movement and Squeak Work
More than 400 specialized subfloor screws were installed into the joists to address existing movement and squeaks on this project.
Former Tiled Hallway
Cement-based self-leveling compound was used in the former tiled hallway to bring the surface into alignment with the adjoining living-room subfloor.
Front-Entry Plywood Repair
A damaged plywood section measuring approximately 2 by 3 feet near the front entry was removed and replaced before installation. The damage was associated with repeated moisture exposure from wet winter footwear.
Transitions, Baseboards and Detail Work
The transition, trim, and limited stair work described here formed part of this specific main-floor installation.
White Oak Transition
A custom flush White Oak transition was fabricated between the new hardwood and the existing kitchen porcelain tile.
New Baseboards
The old 3-inch clamshell baseboards were removed and replaced after removal damage. New 5.5-inch square-edge MDF baseboards were installed, caulked, and painted bright white.
Door Jambs and Casings
Door jambs and casings were carefully undercut with a jamb saw so the new flooring could run beneath the existing trim.
First Three Stair Steps
The entire staircase was not replaced. Carpet was removed from only the first three steps, where custom White Oak retro-treads were installed and the risers were painted white to coordinate with the main-floor hardwood.
Planning the Plank Layout
Because some exterior walls in the Peel Village home were not perfectly square, the installation layout was planned around the longest continuous sightline from the front toward the rear of the main floor.
The chosen direction established the visual alignment through the connected areas, with custom angled perimeter cuts made where required by the walls in this particular home.
Protecting the Occupied Home During Flooring Work
The homeowners and their dog remained in the house during the project. Heavy-duty ZipWall plastic barriers separated the active flooring areas from the kitchen and the staircase leading to the second floor.
Heavy furniture was shifted in two phases, so no storage pod was required for this job. Completed areas were covered with Ram Board as the installation progressed. At the end of workdays on this project, the active areas were swept and cleaned with a HEPA-filter vacuum.
Feedback from the Peel Village Homeowner
"Our 1970s floors were incredibly squeaky and the old skinny hardwood was completely worn out. The Loyalty team came in, ripped everything down to the plywood, and screwed the floor down so tight there isn't a single squeak left in the house. They were so careful moving our heavy furniture around and making sure dust didn't get upstairs. The new wide-plank oak looks stunning and makes the house look twice as big. Truly professional work!"
Peel Village Homeowner
Hardwood Flooring Installation Process
Each project is organized around the existing flooring, agreed scope, material selection, and preparation identified for the home.
Consultation and Existing-Floor Review
Discuss the rooms, current flooring, priorities, intended finish, and project timing.
Scope and Material Planning
Define the material direction, room coverage, removal, transitions, and finishing scope.
Removal and Preparation
Remove agreed existing materials and complete preparation based on the exposed conditions.
Installation and Detail Work
Install the selected flooring and coordinate the approved transitions, baseboards, and trim.
Final Finishing and Walkthrough
Complete the finishing scope, clean the work areas, and review the result with the homeowner.
Brampton Hardwood Flooring Questions
Information for homeowners preparing to discuss a residential hardwood installation.
Do you install hardwood flooring in Brampton?
Yes. Loyalty Contracting provides residential hardwood installation in Brampton, including room-specific, connected-space, and broader main-floor projects.
Do you install engineered hardwood flooring?
Yes. Engineered hardwood is a supported installation option. The material, proposed rooms, existing surface, and installation scope are reviewed for each project.
Can existing flooring be removed before installation?
Yes. Existing-floor removal can be included in the agreed scope. The materials and conditions are reviewed before the necessary removal and preparation work is defined.
What happens if the subfloor needs preparation?
Preparation depends on the conditions found after assessment or removal. On the Peel Village project, specific work addressed existing movement, unevenness, and a small damaged plywood area. The exact preparation depends on the existing flooring and subfloor.
Can new hardwood meet existing kitchen tile?
Transitions to adjoining surfaces can be planned as part of the installation. For the Peel Village home, a custom flush White Oak transition connected the new hardwood to the kitchen's existing porcelain tile.
Are baseboards and trim part of a flooring project?
Baseboards, casings, transitions, and related trim work can be included when they form part of the agreed flooring and finishing scope.
Can hardwood be installed while homeowners remain in the house?
Project logistics depend on the home and scope. The Peel Village homeowners remained in their house while barriers, phased furniture movement, surface protection, and project-specific cleanup measures were used during the work.
How do I request a flooring estimate?
Start with a free consultation using our quote form, call +1 (647) 686-4405, or contact Loyalty Contracting online to discuss the project.
Explore Related Renovation Services
Visit our Brampton Home Renovation page for the broader city overview, review Brampton Kitchen Renovation, or explore our GTA Flooring Installation service page.
Planning Hardwood Flooring Installation in Brampton?
Tell us about the rooms, existing flooring, and hardwood direction you would like to discuss, and we can review the proposed installation scope.